Growing Your Sewing Skills - One Project at a Time

People are increasingly interested in creating their own clothes to express their personal style. With more resources and beginner-friendly sewing courses available, it’s now easier for anyone to learn how to design and make their own outfits.
These courses help people go beyond buying ready-made clothes and start creating pieces that reflect their personality, preferences, and creativity.
There are also practical benefits. Creating your own clothing can be a cost-effective alternative to purchasing premium fashion labels. It also encourages a more sustainable approach to fashion by giving new life to existing materials and helping reduce textile waste.
Another major advantage is achieving a better fit. Clothes made specifically for you are often more comfortable, last longer, and feel more meaningful than mass-produced items.
Getting Started: Essential Tools and Materials
Starting off in sewing means getting your hands on a few key items that make the process smoother and a lot more enjoyable. Your main companion will be a sewing machine, and reliable options such as those from JUKI UK are often preferred by both beginners and experienced sewists for their durability and performance. If the price tag on a new one makes you wince, don’t stress; check if you can borrow from a friend, or hunt around for a pre-loved machine.
Your toolbox should include fabric scissors (the sharp kind that never touch paper), pins, a measuring tape or ruler, a stitch un-picker for the inevitable whoops moments, fabric chalk, and an iron. These basics cover all the core stages from cutting fabric to tidying up those seams. For little extras, pick up some thread, buttons, and elastic based on the first projects you want to tackle.
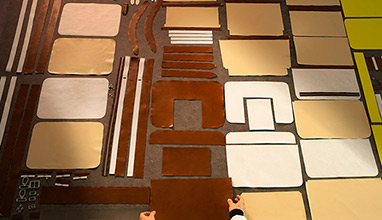
Fabric choices can make or break your start in sewing. Woven cotton and linen are much less slippery than stretch fabrics and are generally a breeze for beginners. Not only do these make the first tries less frustrating, but they hold their shape so you can actually see what you’ve made. If you’re feeling eco-friendly, look for sustainable fabric options; they're usually better quality and will last longer. Linen is a favourite—it may cost a bit more upfront, but it’s planet-friendly, easy to sew, and stylish.
For practising your skills or making some test pieces, raid your local charity shop for fabric scraps. It’s budget-friendly and takes the pressure off making everything perfect with pricey materials straight away.
Understanding Patterns and Measurements
If you’re taking your first steps with sewing patterns, stick with those clearly marked for beginners. Look out for labels like "beginner," "easy," or "simple." Big brands such as Burda use a cotton reel system, where just one reel means it’s straightforward, while Simplicity offers friendly lines like "Learn to Sew" and "It’s So Easy." New Look and Butterick have special ranges too, for example "Yes! It’s Easy See & Sew." It helps to pick patterns with only a handful of pieces—trust me, the less you have to organise, the better your first go will feel.
Independent pattern shops have some great choices too, just double-check whether the seam allowance is included, since some patterns leave this out and it can cause issues later on.
Getting your measurements right is really important. Grab a retractable tape measure and note down your bust, waist, hips, and inseam while standing straight in fitted clothes. Always compare your results with the pattern’s sizing chart. Finished garment measurements are usually printed too, so you can see how close that new dress or trousers will come to your ideal fit. If something’s not quite matching up, tweak the areas that feel too tight or too roomy.
Modern sewing setups supported by machines like those from JUKI UK can also make adjustments and precision stitching much easier, especially when working on more detailed pattern alterations.
Adjusting patterns doesn’t have to be complicated. Start by altering hem lengths—most patterns have lines to show you where to do this. As you build confidence, you can try changing the waistband or adjusting darts at the bust. With a bit of practice, working with patterns and making quick changes becomes part of the fun, almost second nature, and your projects will fit like a dream.
From Concept to Creation: Designing Your Clothes
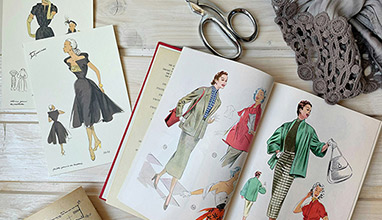
Coming up with a design usually starts with a mood board and a sketch or two—think of this as plotting out your style roadmap. A mood board isn’t just a pretty collage; it gives you something to look at and draw ideas from. Don’t limit yourself to photos of other clothes. Mix in snaps of buildings, autumn leaves, paintings—whatever sparks an idea. A palette of three to five core colours is all you need to keep your looks feeling connected.
Fashion sketches don’t have to win art awards. Most designers use croquis, those simple body outlines you can print and scribble over fast. These templates help you play with overall shape and think about the big stuff, like where a hem falls or whether you want a boxy top or something more fitted. Don’t get hung up on details or faces—just sketch, move on, and capture the main vibe.
Next comes pattern making, the key step that turns your drawing into a garment you can actually wear. There are two main ways to go about it. Draping is all about working with fabric directly on a mannequin or dress form, shaping and pinning it to see what feels right. It’s hands-on, sometimes messy, and perfect if your design is on the complex side. If you prefer something a little less freeform, flat pattern making is more structured. Here, you start with a basic pattern—called a sloper—that fits your body and then tweak it to match your sketch. This way, you know it’s really made for you, not some imaginary average person. Once you’ve got your sloper sorted, you can adapt it endlessly for new looks.
With these steps, even first-timers can shift from ideas in their head to a finished piece that’s personal and fits just as you want.
Step-by-Step Sewing Techniques

Mastering a few basic sewing skills will set you up for success with any project. The must-have building blocks are creating seams, finishing hems, and learning a handful of stitches.
Seams are what keep your fabrics together. The plain seam is where most people start: place two fabric pieces with their right sides facing, then sew along the edge. If you want a tidy edge, try a French seam, which tucks away loose threads, or an overlocked seam if you’re working with stretchy, knit fabrics—this helps stop fraying.
Finishing an edge with a hem makes a huge difference, especially for garment bottoms. The classic double-fold hem is beginner-friendly: fold the raw edge twice, then sew it flat. Rolled hems look neat and are perfect for thinner fabrics like silk, while a blind hem gives you a subtle finish where stitches barely show on the outside.
Stitches each have their own job. Use a straight stitch for basic seams, zigzag for reinforcing raw edges and adding a bit of stretch, and experiment with decorative stitches when you want to add some character, especially when working on more advanced projects using JUKI UK electric sewing machines.
If you’re eager to improve, practise is your best friend. Use leftover fabric so you can explore different techniques without worry. Before diving into your main project, test machine settings and try out various seams and hems on these scraps. It’s a smart way to build confidence and spot mistakes early—blunders on test fabric never sting as much as ruining something you were excited to wear.
Prototyping and Fitting
Testing your pattern with a toile or muslin is one of the smartest moves you can make in garment sewing. Think of it as a practice run with unglamorous but forgiving fabric, where mistakes are learning moments rather than expensive regrets. This test garment tells you right away whether your pattern suits your shape, helps you fine-tune the fit, and lets you experiment with design tweaks before using your preferred materials.
Start by slipping the toile on and standing in good light. Look out for areas that feel awkward or hang strangely, like a neckline that’s too tight, armholes that dig in, or a hemline that just isn’t working. Mark these trouble spots with pins or a washable fabric marker while you’re wearing the muslin. Even small changes—like shifting the waist a bit higher or lowering a neckline—can transform the comfort and final look.
If the silhouette or design details on the toile aren’t giving you what you want, here’s your chance to adjust them on the spot. Use your fabric marker to re-draw lines for hems, shape out excess volume, or sketch different details right on the cotton. Changes are quick and low-pressure, since you haven’t touched your nice fabric yet.
Don’t expect perfection first time. It often takes a few rounds to really nail the fit and style you’re after, and that’s absolutely normal—even professionals take a few goes to get it right. Each tweak brings you closer to a garment you’ll be genuinely excited to wear.
Hits: 473 | Leave a comment
Tags:sewing, garments, sewing courses, sewing machines
About the Author

Stella Cooter
Journalist, traveller and mother, Stella writes about fashion and style, luxury and adventure.